

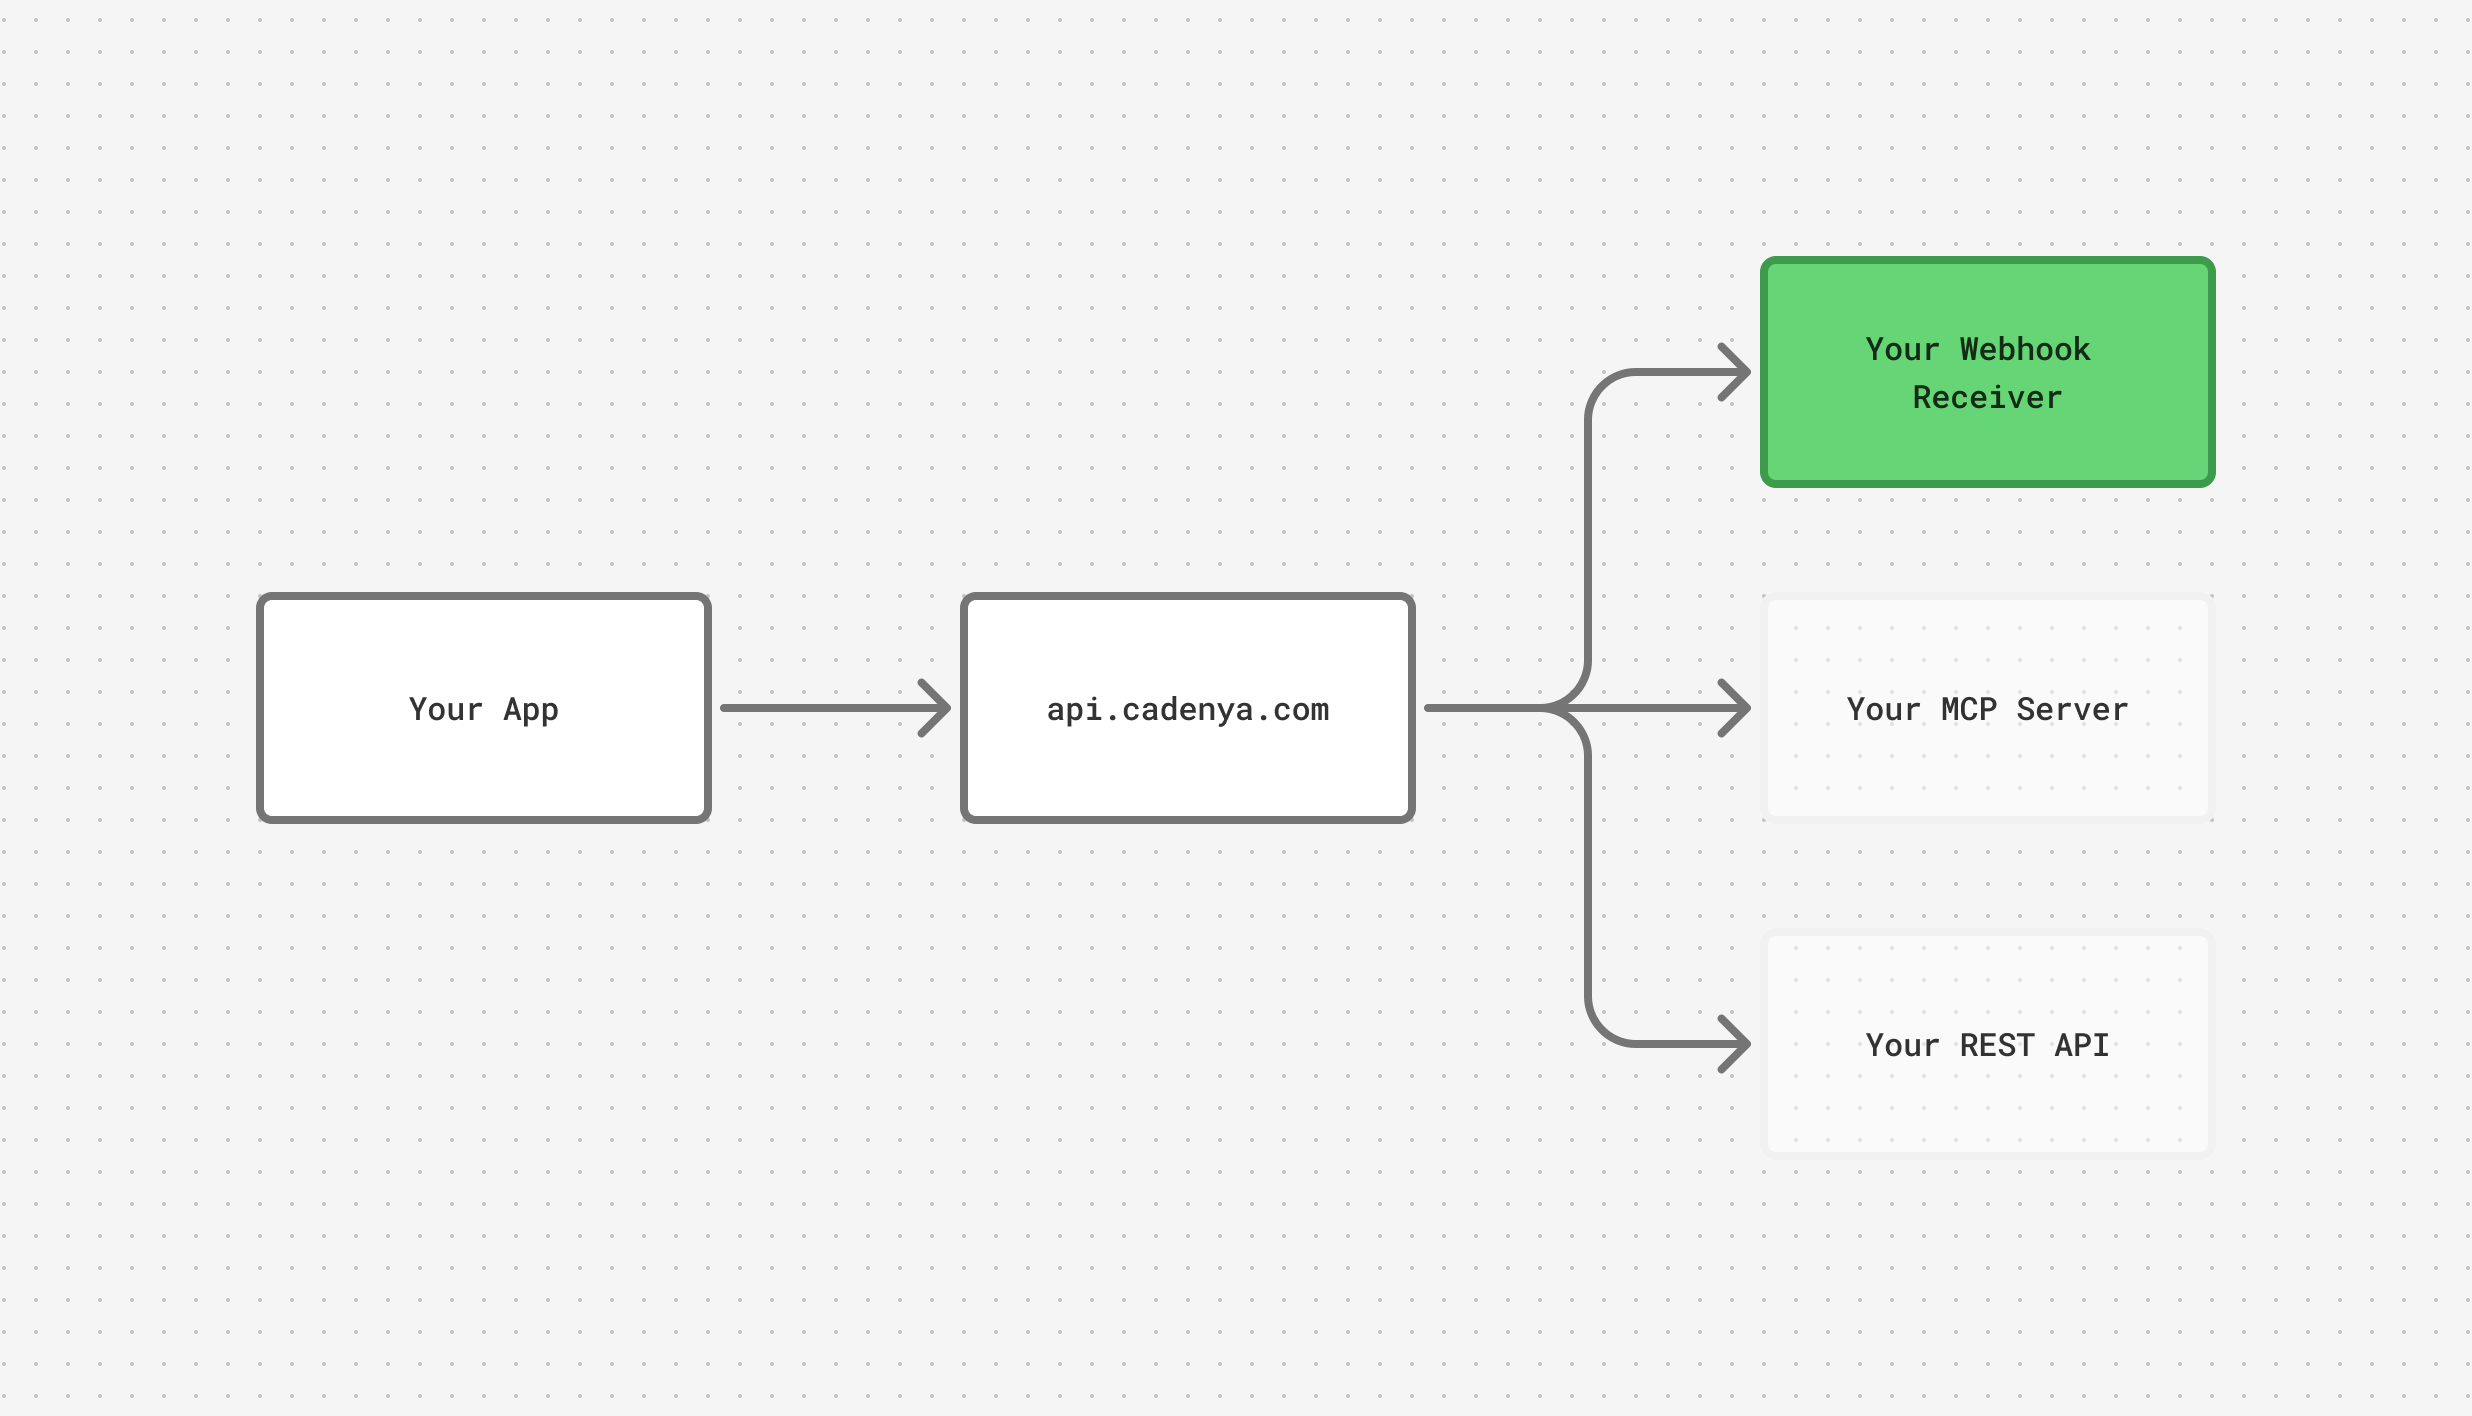
Building in TypeScript, Go, or Ruby? The Cadenya SDK verifies the signature and parses the payload for you with
webhooks.unwrap. The Approving a tool and Email updates from an objective guides build the full handler. The HMAC steps below show the mechanism by hand, for a language without an SDK helper or when you want to see what unwrap does under the hood.Recommended tools
Two tools pair well with agent webhooks: Svix Play as a destination, and the Standard Webhooks verifier, while you build against Cadenya.Webhooks
Webhooks sent by Cadenya conform to Standard Webhooks. They are delivered as POST requests with a JSON envelope containingtype, timestamp, and data (with flat agent, agentVariation, objective, and objectiveEvent keys). Signed via Standard Webhooks HMAC-SHA256 (webhook-id, webhook-timestamp, webhook-signature headers).
Handling a webhook
Cadenya webhooks containmetadata keys with the information about the event. For example, an objective_event.assistant_message looks like this:
Handling HMAC
Cadenya webhooks follow Standard Webhooks, verified with HMAC. Find the signing secret on the Webhooks page of your account settings, where you can also rotate it. Most languages have a Standard Webhooks library that verifies for you, Ruby included, and it decodes the base64 secret and checks the signature in one call. The Cadenya Ruby SDK wraps exactly that inwebhooks.unwrap. To show the mechanism underneath, here it is by hand in Ruby.
First, here’s an example of a request your server receives:
{webhook-id}.{webhook-timestamp}.{raw-body}, HMAC’d with your account’s webhook signing key. That key arrives as whsec_<base64>: strip the whsec_ prefix and base64-decode the rest to the raw bytes you sign with.
Ruby verifier (Sinatra-style)
Example workflow
Say you want to let a user know when your AI Agent is requesting permission to use a tool. For example: approving an expense for a user. The flow would look like:- Cadenya sends your application a webhook
- Your application sends an email to the user with a link to approve or reject
- The customer clicks the “approve” link which is hosted by your app, and then sends Cadenya an approve tool call API request.
- Your AI Agent in Cadenya continues
Use case: smelly expenses
Say you are building the next expense tracking application (because there aren’t enough), and you want an AI Agent to validate and run smell checks on the receipt for you. If the receipt is suspicious, the agent might ask for approval before marking it as completed. Your agent’s system prompt might resemble this: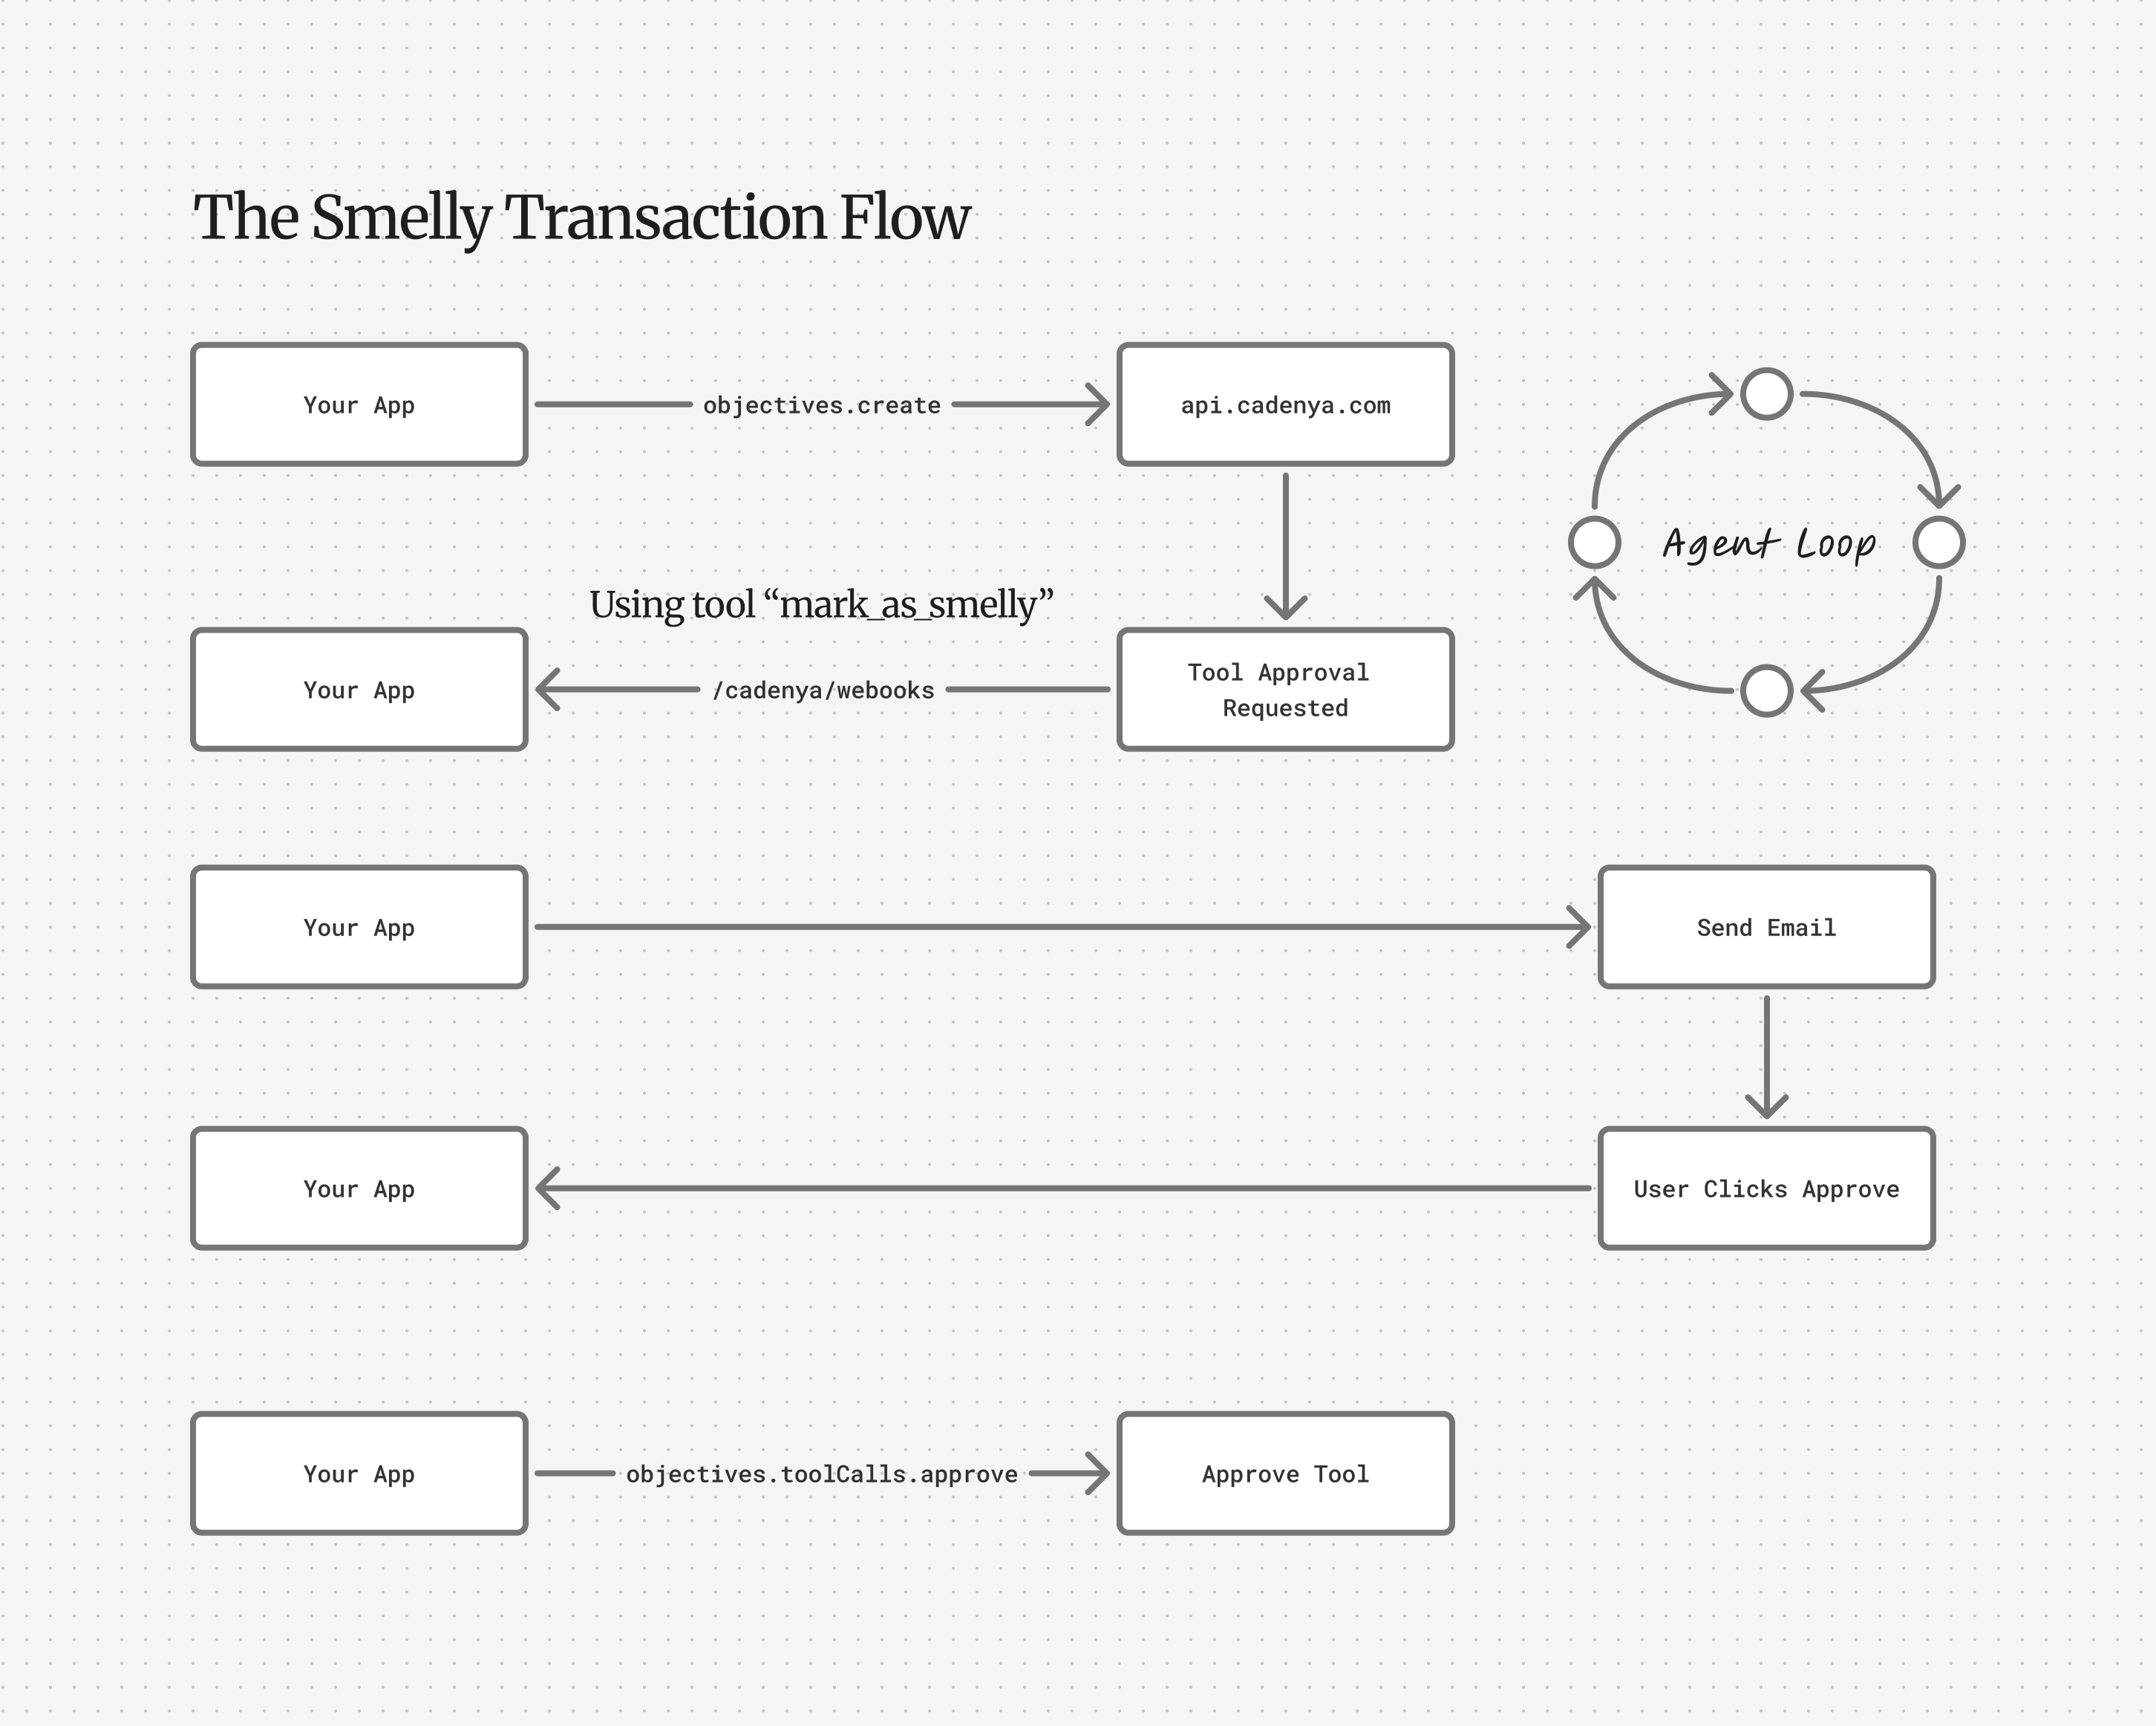
Tricks
It is recommended to leverage theexternalId and labels fields of any metadata key in Cadenya to track your own state. For example, if the receipt in your own database has an ID of receipt_cy1shs, you can store it in the externalId of your objective on create:
externalId you assigned in the payload: